How to Build a RAG Chatbot with Next.js and Supabase: A Complete Guide

Want to build a chatbot that actually knows your data? Traditional chatbots are limited to their training data, but RAG (Retrieval-Augmented Generation) changes everything by letting you ground AI responses in your own documents, databases, and knowledge bases.
In this tutorial, you'll learn how to build a production-ready RAG chatbot using Next.js, Supabase with pgvector, and modern AI APIs. By the end, you'll have a working chatbot that can answer questions about any content you provide.
What Is RAG and Why Should You Care?
RAG (Retrieval-Augmented Generation) is a technique that combines the power of large language models with your own data. Instead of relying solely on what the AI was trained on, RAG retrieves relevant information from your knowledge base and uses it to generate accurate, contextual responses.
The Problem with Standard LLMs
Large language models like GPT-4 or Gemini are impressive, but they have limitations:
- Knowledge cutoff: They don't know about events after their training date
- No access to your data: They can't reference your documentation, products, or internal knowledge
- Hallucination risk: Without grounding, they may generate plausible-sounding but incorrect information
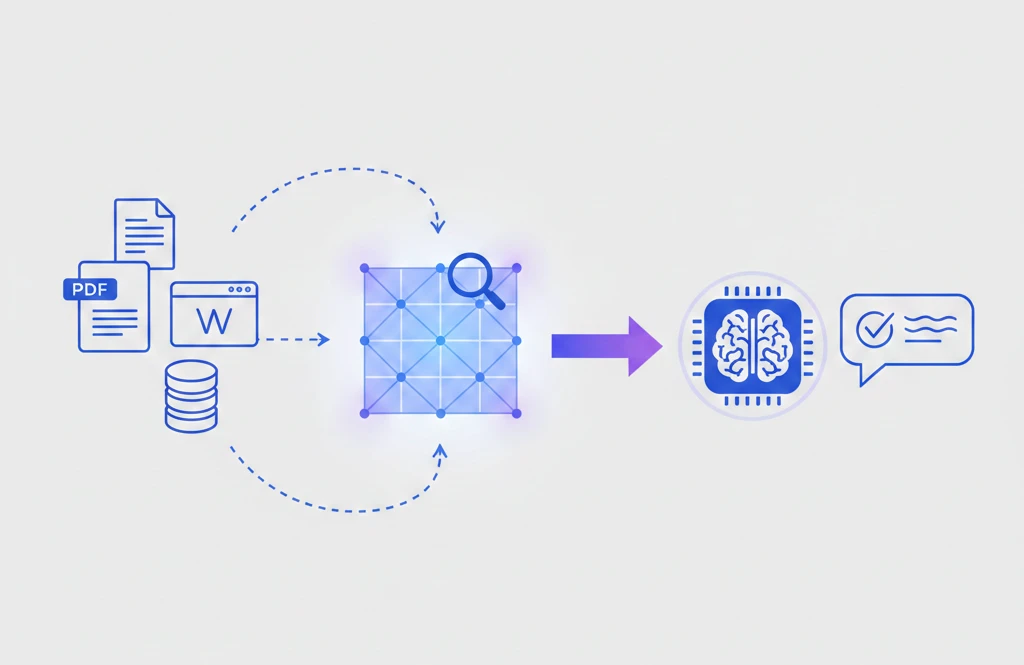
How RAG Solves This
RAG works in three phases:
- Indexing: Convert your documents into vector embeddings and store them in a vector database
- Retrieval: When a user asks a question, find the most relevant document chunks using semantic search
- Generation: Pass the retrieved context to the LLM to generate an accurate, grounded response
This approach gives you the best of both worlds: the reasoning capabilities of LLMs combined with the accuracy of your own data.
The Tech Stack
For this tutorial, we'll use:
- Next.js 15: React framework with App Router for the frontend and API routes
- Supabase: PostgreSQL database with the pgvector extension for vector storage
- OpenAI or Gemini: For generating embeddings and chat completions
- TypeScript: For type safety throughout
This stack is production-ready, scalable, and uses tools you likely already know.
Step 1: Setting Up Supabase with pgvector
First, you need a Supabase project with the pgvector extension enabled. If you don't have one, create a free project at supabase.com.
Enable pgvector
In your Supabase SQL Editor, run:
-- Enable the pgvector extension
create extension if not exists vector;
Create the Documents Table
Create a table to store your document chunks and their embeddings:
create table documents (
  id bigserial primary key,
  content text not null,
  metadata jsonb,
  embedding vector(1536)
);

-- Create an index for faster similarity searches
create index on documents using ivfflat (embedding vector_cosine_ops)
  with (lists = 100);
The vector(1536) type stores OpenAI's text-embedding-ada-002 embeddings. If you're using a different model, adjust the dimension accordingly (Gemini uses 768 dimensions).
Create the Search Function
Create a PostgreSQL function for semantic search:
create or replace function match_documents (
  query_embedding vector(1536),
  match_threshold float,
  match_count int
)
returns table (
  id bigint,
  content text,
  metadata jsonb,
  similarity float
)
language sql stable
as $$
  select
    documents.id,
    documents.content,
    documents.metadata,
    1 - (documents.embedding <=> query_embedding) as similarity
  from documents
  where 1 - (documents.embedding <=> query_embedding) > match_threshold
  order by similarity desc
  limit match_count;
$$;
This function uses cosine similarity (<=> operator) to find documents most similar to a query.
Step 2: Creating Embeddings
Embeddings are numerical representations of text that capture semantic meaning. Similar texts have similar embeddings, enabling semantic search.
Install Dependencies
npm install @supabase/supabase-js openai
Or if you're using Gemini:
npm install @supabase/supabase-js @google/generative-ai
Embedding Function with OpenAI
Create a utility function to generate embeddings:
// lib/embeddings.ts
import OpenAI from 'openai'

const openai = new OpenAI({
  apiKey: process.env.OPENAI_API_KEY,
})

export async function generateEmbedding(text: string): Promise<number[]> {
  const response = await openai.embeddings.create({
    model: 'text-embedding-ada-002',
    input: text,
  })

  return response.data[0].embedding
}
Embedding Function with Gemini
If you prefer Google's Gemini:
// lib/embeddings.ts
import { GoogleGenerativeAI } from '@google/generative-ai'

const genAI = new GoogleGenerativeAI(process.env.GEMINI_API_KEY!)

export async function generateEmbedding(text: string): Promise<number[]> {
  const model = genAI.getGenerativeModel({ model: 'embedding-001' })
  const result = await model.embedContent(text)
  return result.embedding.values
}
Step 3: Indexing Your Documents
Before your chatbot can answer questions, you need to index your content. This involves:
- Splitting documents into chunks
- Generating embeddings for each chunk
- Storing them in Supabase
Document Chunking
Large documents should be split into smaller chunks for better retrieval accuracy:
// lib/chunking.ts
export function chunkText(text: string, chunkSize = 1000, overlap = 200): string[] {
  const chunks: string[] = []
  let start = 0

  while (start < text.length) {
    const end = Math.min(start + chunkSize, text.length)
    chunks.push(text.slice(start, end))
    start = end - overlap
  }

  return chunks
}
Indexing Script
Create a script to index your documents:
// scripts/index-documents.ts
import { createClient } from '@supabase/supabase-js'
import { generateEmbedding } from '../lib/embeddings'
import { chunkText } from '../lib/chunking'

const supabase = createClient(
  process.env.NEXT_PUBLIC_SUPABASE_URL!,
  process.env.SUPABASE_SERVICE_ROLE_KEY!
)

async function indexDocument(content: string, metadata: Record<string, unknown>) {
  const chunks = chunkText(content)

  for (const chunk of chunks) {
    const embedding = await generateEmbedding(chunk)

    const { error } = await supabase.from('documents').insert({
      content: chunk,
      metadata,
      embedding,
    })

    if (error) {
      console.error('Error inserting document:', error)
      throw error
    }
  }

  console.log(`Indexed ${chunks.length} chunks`)
}

// Example usage
const sampleContent = `
Your documentation or knowledge base content goes here.
This could be product documentation, FAQs, articles, or any text
you want your chatbot to be able to reference.
`

indexDocument(sampleContent, { source: 'documentation', title: 'Getting Started' })
Run this script whenever you need to add or update content in your knowledge base.
Step 4: Implementing Semantic Search
Now let's create a function to search your indexed documents:
// lib/search.ts
import { createClient } from '@supabase/supabase-js'
import { generateEmbedding } from './embeddings'

const supabase = createClient(
  process.env.NEXT_PUBLIC_SUPABASE_URL!,
  process.env.SUPABASE_SERVICE_ROLE_KEY!
)

export interface SearchResult {
  id: number
  content: string
  metadata: Record<string, unknown>
  similarity: number
}

export async function searchDocuments(
  query: string,
  matchCount = 5,
  matchThreshold = 0.7
): Promise<SearchResult[]> {
  // Generate embedding for the query
  const queryEmbedding = await generateEmbedding(query)

  // Search for similar documents
  const { data, error } = await supabase.rpc('match_documents', {
    query_embedding: queryEmbedding,
    match_threshold: matchThreshold,
    match_count: matchCount,
  })

  if (error) {
    console.error('Search error:', error)
    throw error
  }

  return data as SearchResult[]
}
The matchThreshold parameter filters out results below a certain similarity score, ensuring only relevant documents are returned.
Step 5: Building the Chat Interface
Now let's build the frontend chat interface using Next.js and React.
Chat API Route
Create an API route to handle chat messages:
// app/api/chat/route.ts
import { NextRequest, NextResponse } from 'next/server'
import OpenAI from 'openai'
import { searchDocuments } from '@/lib/search'

const openai = new OpenAI({
  apiKey: process.env.OPENAI_API_KEY,
})

export async function POST(req: NextRequest) {
  try {
    const { message, history } = await req.json()

    // Search for relevant context
    const relevantDocs = await searchDocuments(message, 3)

    // Build context from retrieved documents
    const context = relevantDocs
      .map((doc) => doc.content)
      .join('\n\n---\n\n')

    // Create the system prompt with context
    const systemPrompt = `You are a helpful assistant that answers questions based on the provided context.
Always base your answers on the context provided. If the context doesn't contain enough information
to answer the question, say so honestly.

Context:
${context}`

    // Build messages array
    const messages = [
      { role: 'system' as const, content: systemPrompt },
      ...history,
      { role: 'user' as const, content: message },
    ]

    // Generate response
    const completion = await openai.chat.completions.create({
      model: 'gpt-4-turbo-preview',
      messages,
      temperature: 0.7,
      max_tokens: 1000,
    })

    const response = completion.choices[0].message.content

    return NextResponse.json({
      response,
      sources: relevantDocs.map((doc) => ({
        content: doc.content.slice(0, 200) + '...',
        metadata: doc.metadata,
        similarity: doc.similarity,
      })),
    })
  } catch (error) {
    console.error('Chat error:', error)
    return NextResponse.json(
      { error: 'Failed to process message' },
      { status: 500 }
    )
  }
}
Chat Component
Create a React component for the chat interface:
// components/Chat.tsx
'use client'

import { useState, useRef, useEffect } from 'react'

interface Message {
  role: 'user' | 'assistant'
  content: string
}

interface Source {
  content: string
  metadata: Record<string, unknown>
  similarity: number
}

export function Chat() {
  const [messages, setMessages] = useState<Message[]>([])
  const [input, setInput] = useState('')
  const [isLoading, setIsLoading] = useState(false)
  const [sources, setSources] = useState<Source[]>([])
  const messagesEndRef = useRef<HTMLDivElement>(null)

  useEffect(() => {
    messagesEndRef.current?.scrollIntoView({ behavior: 'smooth' })
  }, [messages])

  async function handleSubmit(e: React.FormEvent) {
    e.preventDefault()
    if (!input.trim() || isLoading) return

    const userMessage = input.trim()
    setInput('')
    setMessages((prev) => [...prev, { role: 'user', content: userMessage }])
    setIsLoading(true)

    try {
      const response = await fetch('/api/chat', {
        method: 'POST',
        headers: { 'Content-Type': 'application/json' },
        body: JSON.stringify({
          message: userMessage,
          history: messages,
        }),
      })

      const data = await response.json()

      if (data.error) {
        throw new Error(data.error)
      }

      setMessages((prev) => [
        ...prev,
        { role: 'assistant', content: data.response },
      ])
      setSources(data.sources || [])
    } catch (error) {
      console.error('Error:', error)
      setMessages((prev) => [
        ...prev,
        { role: 'assistant', content: 'Sorry, something went wrong.' },
      ])
    } finally {
      setIsLoading(false)
    }
  }

  return (
    <div className="flex flex-col h-[600px] max-w-2xl mx-auto">
      <div className="flex-1 overflow-y-auto p-4 space-y-4">
        {messages.map((msg, i) => (
          <div
            key={i}
            className={`p-3 rounded-lg ${
              msg.role === 'user'
                ? 'bg-blue-100 ml-auto max-w-[80%]'
                : 'bg-gray-100 mr-auto max-w-[80%]'
            }`}
          >
            {msg.content}
          </div>
        ))}
        {isLoading && (
          <div className="bg-gray-100 p-3 rounded-lg mr-auto">
            Thinking...
          </div>
        )}
        <div ref={messagesEndRef} />
      </div>

      {sources.length > 0 && (
        <div className="p-2 border-t">
          <p className="text-sm text-gray-500">Sources used:</p>
          <div className="flex gap-2 overflow-x-auto">
            {sources.map((source, i) => (
              <div key={i} className="text-xs bg-gray-50 p-2 rounded">
                {source.metadata?.title || `Source ${i + 1}`}
                <span className="text-gray-400 ml-1">
                  ({Math.round(source.similarity * 100)}% match)
                </span>
              </div>
            ))}
          </div>
        </div>
      )}

      <form onSubmit={handleSubmit} className="p-4 border-t">
        <div className="flex gap-2">
          <input
            type="text"
            value={input}
            onChange={(e) => setInput(e.target.value)}
            placeholder="Ask a question..."
            className="flex-1 p-2 border rounded-lg"
            disabled={isLoading}
          />
          <button
            type="submit"
            disabled={isLoading}
            className="px-4 py-2 bg-blue-500 text-white rounded-lg disabled:opacity-50"
          >
            Send
          </button>
        </div>
      </form>
    </div>
  )
}
Step 6: Production Considerations
Before deploying your RAG chatbot to production, consider these important factors.
Rate Limiting
Protect your API routes from abuse:
import { Ratelimit } from '@upstash/ratelimit'
import { Redis } from '@upstash/redis'

const ratelimit = new Ratelimit({
  redis: Redis.fromEnv(),
  limiter: Ratelimit.slidingWindow(10, '1 m'), // 10 requests per minute
})

// In your API route
const ip = req.headers.get('x-forwarded-for') ?? '127.0.0.1'
const { success } = await ratelimit.limit(ip)

if (!success) {
  return NextResponse.json({ error: 'Rate limited' }, { status: 429 })
}
Caching Embeddings
Generating embeddings costs money and takes time. Cache them when possible:
import { Redis } from '@upstash/redis'

const redis = Redis.fromEnv()

async function getCachedEmbedding(text: string): Promise<number[] | null> {
  const cacheKey = `embedding:${hashText(text)}`
  const cached = await redis.get<number[]>(cacheKey)
  return cached
}

async function cacheEmbedding(text: string, embedding: number[]): Promise<void> {
  const cacheKey = `embedding:${hashText(text)}`
  await redis.set(cacheKey, embedding, { ex: 86400 }) // Cache for 24 hours
}
Streaming Responses
For better UX, stream responses instead of waiting for the full completion:
// app/api/chat/route.ts
import { OpenAIStream, StreamingTextResponse } from 'ai'

export async function POST(req: NextRequest) {
  // ... retrieve context ...

  const response = await openai.chat.completions.create({
    model: 'gpt-4-turbo-preview',
    messages,
    stream: true,
  })

  const stream = OpenAIStream(response)
  return new StreamingTextResponse(stream)
}
Error Handling and Fallbacks
Always have fallback behavior:
try {
  const docs = await searchDocuments(query)
  if (docs.length === 0) {
    // No relevant documents found
    return generateFallbackResponse(query)
  }
  // ... continue with RAG ...
} catch (error) {
  // Log error and provide graceful fallback
  console.error('RAG pipeline error:', error)
  return generateGenericResponse(query)
}
Security Best Practices
- Never expose service role keys to the client
- Validate and sanitize all user inputs
- Use Row Level Security (RLS) if you have multi-tenant data
- Implement proper authentication before allowing access to sensitive knowledge bases
Next Steps
You now have a working RAG chatbot. Here are ways to improve it:
Improve Retrieval Quality
- Experiment with chunk sizes: Smaller chunks (500 chars) for precise answers, larger (2000 chars) for context
- Add hybrid search: Combine semantic search with keyword search for better results
- Implement reranking: Use a reranker model to improve result ordering
Enhance the User Experience
- Add conversation memory: Store chat history for context-aware follow-up questions
- Implement citations: Show users exactly which documents were used to generate answers
- Add feedback mechanisms: Let users rate responses to improve over time
Scale for Production
- Use a dedicated vector database: Consider Pinecone, Weaviate, or Qdrant for larger datasets
- Implement proper monitoring: Track latency, token usage, and error rates
- Set up CI/CD pipelines: Automate document re-indexing when content changes
Learn More
This tutorial covered the fundamentals of building a RAG chatbot. For a deeper dive into RAG architecture, advanced retrieval techniques, and production best practices, check out our comprehensive course: Full-Stack RAG with Next.js, Supabase & Gemini.
The course covers:
- Advanced chunking strategies and document preparation
- Optimizing retrieval with hybrid search and reranking
- Conversational RAG with memory
- Building production-ready chat interfaces
- Security, performance, and cost optimization
If you want to understand the fundamentals of vector databases first, we also have a dedicated Vector Databases for AI course and an introductory article on what are vector databases and how they work.
Ready to build your own RAG chatbot? Start with the code examples above, index your own content, and see the power of grounded AI responses in action.
Liked this article?
Get the weekly AI digest
New free courses, the latest from the blog, and practical AI tips.
Free forever. Unsubscribe anytime.
Related articles
What is RAG (Retrieval Augmented Generation)? Explained for Beginners
Learn what Retrieval Augmented Generation (RAG) is, how it works step by step, and why it matters for building AI applications that use your own data.
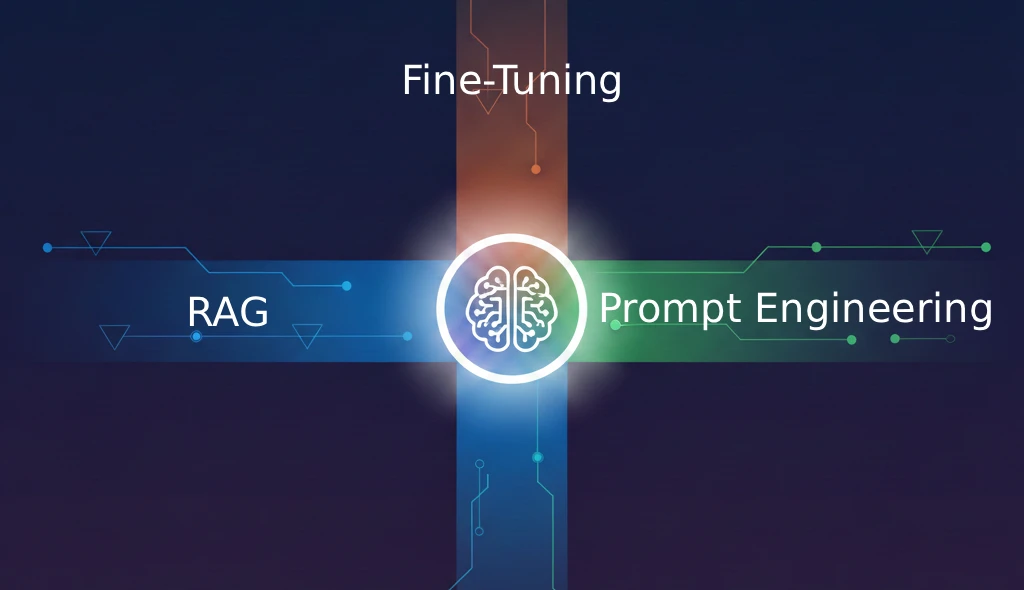
RAG vs Fine-Tuning vs Prompt Engineering: When to Use Each for AI Apps
Compare RAG, fine-tuning, and prompt engineering for customizing LLMs. Learn when to use each approach, cost differences, and how to combine them for production AI applications.

Retrieval Optimization for RAG: Chunking, Re-ranking & Quantization
Master retrieval optimization RAG techniques in 2026: smart chunking, cross-encoder re-ranking, and vector quantization to cut latency, cost, and hallucinations.